Creating a Hugo Theme - Part 1: With TailwindCSS v4
Building a blog has been on my mind for a long time, and I finally decided to take the plunge. I had always wanted to create a blog with Hugo, and I spent hours browsing through the list of themes, trying to choose the perfect one. After much deliberation, I thought, “Why not create my own?” This would make for a great blog post topic as well.
Let’s get started.
Creating a Hugo Project #
First, ensure that Hugo is installed.
$ hugo new site <blog-name>
$ cd <blog-name>
Create the site and run hugo server -D.

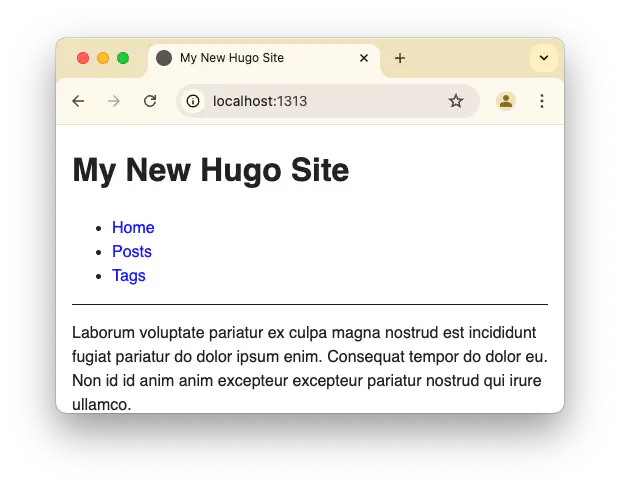
An error appears stating that no pages were found. This is likely because there is no theme. Since the themes directory is empty, let’s generate a skeleton theme.
$ hugo new theme <theme-name>
Next, configure the theme in the hugo.toml file.
baseURL = 'https://example.org/'
languageCode = 'en-us'
title = 'My New Hugo Site'
theme = "<theme-name>"
Run hugo server -D again.
$ hugo server -D

hugo v0.137.0+extended darwin/arm64 BuildDate=2024-11-04T16:04:06Z VendorInfo=brew

                   | EN
-------------------+-----
  Pages            | 30
  Paginator pages  |  0
  Non-page files   | 15
  Static files     |  1
  Processed images |  0
  Aliases          |  0
  Cleaned          |  0

Built in 12 ms
Environment: "development"
Serving pages from disk
Running in Fast Render Mode. For full rebuilds on change: hugo server --disableFastRender
Web Server is available at http://localhost:1313/ (bind address 127.0.0.1)
Press Ctrl+C to stop

Finally, we can see some content. Now, let’s take a moment to decide what to do next.
Setting Up TailwindCSS #
I decided to use TailwindCSS because working with pure CSS or Sass feels too cumbersome for me. I’ll use the latest version of TailwindCSS v4 and integrate it with Hugo.
Refer to the Hugo documentation and TailwindCSS official site to install the required packages.
npm install --save-dev tailwindcss@next @tailwindcss/cli@next
Add the following to the themes/<theme-name>/assets/css/main.css file:
@import "tailwindcss";
Then, update the hugo.toml file with the following settings:
[build]
  [[build.cachebusters]]
    source = 'layouts/.*'
    target = 'css'
Next, update the themes/<theme-name>/layouts/partials/head/css.html file with the following:
{{ with resources.Get "css/main.css" }}
  {{ $opts := dict "minify" true }}
  {{ with . | css.TailwindCSS $opts }}
    {{ if hugo.IsDevelopment }}
      <link rel="stylesheet" href="{{ .RelPermalink }}">
    {{ else }}
      {{ with . | fingerprint }}
        <link rel="stylesheet" href="{{ .RelPermalink }}" integrity="{{ .Data.Integrity }}" crossorigin="anonymous">
      {{ end }}
    {{ end }}
  {{ end }}
{{ end }}
This will integrate TailwindCSS. However, to resolve caching issues, replace {{ partialCached "head/css.html" . }} with partial.
<meta charset="utf-8">
<meta name="viewport" content="width=device-width">
<title>{{ if .IsHome }}{{ site.Title }}{{ else }}{{ printf "%s | %s" .Title site.Title }}{{ end }}</title>

{{ partial "head/css.html" . }}
{{ partialCached "head/js.html" . }}
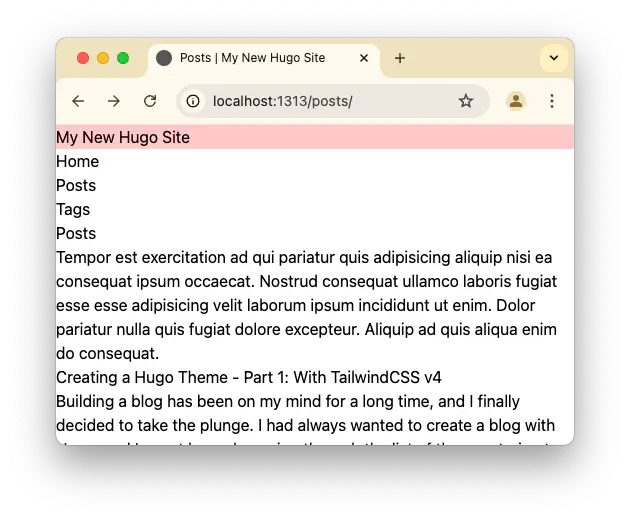
Now, restart the server with hugo server -D, and modify the
themes/<theme-name>/layouts/partials/header.html file to check if the styles are applied correctly.
<span class="bg-red-200">{{ site.Title }}</span>
{{ partial "menu.html" (dict "menuID" "main" "page" .) }}

The TailwindCSS integration works perfectly! However, there was an issue with TailwindCSS IntelliSense in VS Code, which was resolved by restarting the editor.
Conclusion #
I was worried that setting up TailwindCSS might be complicated, but it turned out to be simpler than expected. I’m particularly happy that many cumbersome steps from v3 are no longer required. That said, I need to learn more about the new features and changes in v4.
Now it’s time to think about how to style the theme. By the time this post is published, the theme should be partially complete. See you in the next post!
Quote
Even though the file changes, the style doesn’t update immediately. However, it refreshes upon reloading the browser.


